
Manufacturing the Board Game
- Roberto Quinones Castillo

- 28 may 2019
- 3 min de lectura
Our prototype indicates that we wanted to divide the board game into two; the top of the board game, where all the faces of the players are printed and the base of the board game were the ISD1820, Makey Makey, power supply and space for the connections to be at. As you can see from the image we have a box with space between the top(cover) and bottom(base) layers.
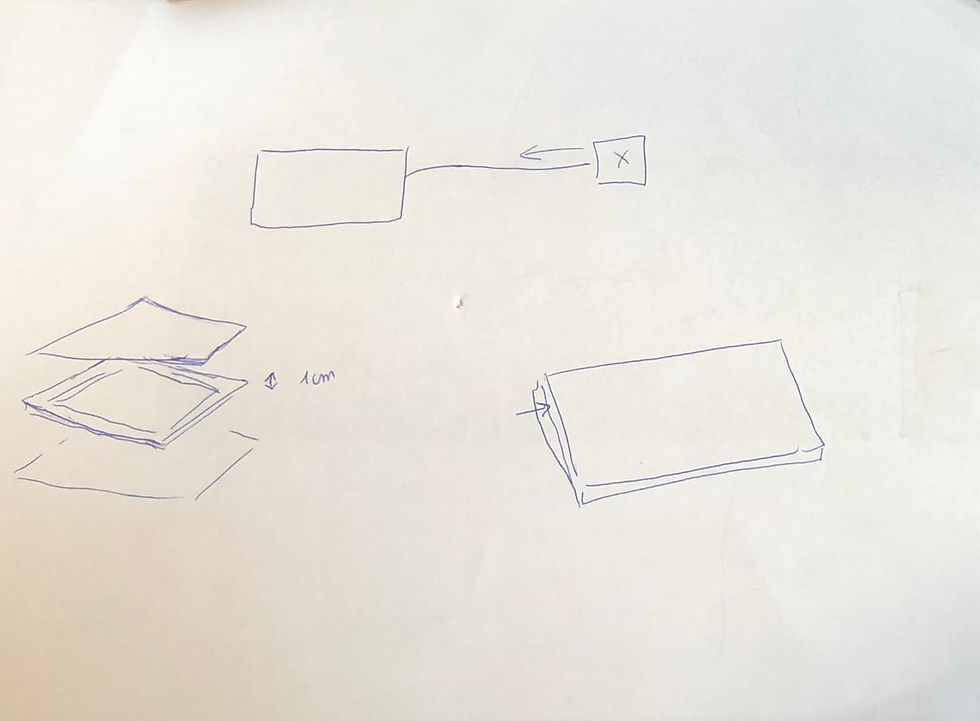
Our top layer has dimensions of 28 x 21.5 cm with a thickness of 2mm. The dimensions are on purpose in order to have a very light and versatile game, however the thickness it’s not important, it was only used to recycle a triplay wood we founded.
We had the idea to have the top layer not fixed to the sides. This idea is for an specific reason, the ISD1820, the battery supply, the connections, etc are attached to the bottom layer. Therefore, the only way to access to them and manipulate them easily is by removing the top layer. For that reason and in order to facilitate future modifications such as; replacing batteries, changing audio, etc, the top layer of the board game is removable.
Both sides of the board game have length of 21.5 cm since they will serve as the support for the top layer. They have a height of 6cm, this is enough space to install the battery supply, ISD1820, arduino and connections. The thickness of the sides are not that important however, the thickness of the sides are 0.2mm. We also grabbed these two sides also from a recycle bin. So its not fundamental to have the same height and thickness, however the length must match the width of the top layer.

BASE OF THE BOARD GAME
The bottom layer or base of the board game is very important, you must be careful with the measurements, we needed to add 2 cm of length. Why? Well the top layer will be hold by little screws attach to the sides. The top layer will never make contact with the sides. However the bottom layer will have contact with the sides. Each side will be pasted with white glue for wood to the sides of the bottom layer. The measurements of the bottom layer are the following: 30 x 21.5 cm by 1cm of thickness. The thickness is very important since we need area to apply the glue, throughout this area ( width) of the sides of the bottom layer contact will be made with the sides of the board game.
After applying the glue to the sides of the bottom layer of 2 cm, we attached the two sides of the board game, level with prep the sides of the board game with the thickness of the base (bottom layer). Leave this for 2 hours without touching it so it dries completely.

After the 2 hours passed, we make the two holes for the screws. As mentioned, these screws will serve as a holding platform for the top layer. The screws have a diameter of 3mm and a length of 4 cm. This length can be adjusted, however, this length is suggested in order for the top layer ro be placed without any movements. We made the holes with a driller, specifically from each corner 5 cm horizontally and 3 cm vertically. After drilling, attach the screws into the holes, in order to have the screws firmly, a washermay be used. In our case we used a washer


Comentarios